PFFE is a flexible and simple graphical user interface for SPAG, GXCHK, CVRANAL and HyperKWIC. It allows users to perform common tasks, such as restructuring, global static analysis, dynamic analysis, coverage and key word in context analysis with a minimum of fuss and without using the command line.
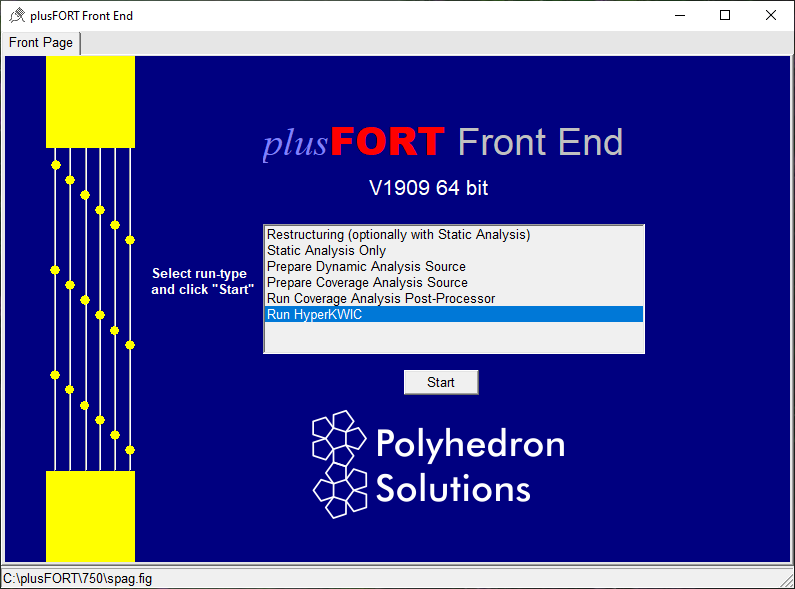
Figure 7 The PFFE Front Page
When PFFE is started, the front page is displayed (Figure 6). You should select the operation you would like to perform, and click Start. A full description of these operations may be found in chapters 2, 3 and 4 of this manual.
PFFE will next display a dialog to allow you to set the working directory.
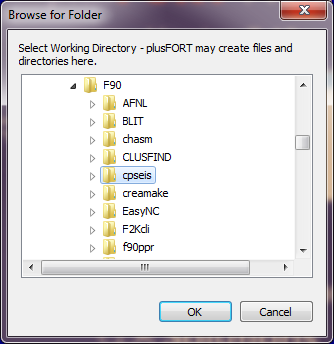
Figure 8 The Working Directory Dialog
The working directory may be regarded as the "home" directory for the program you are working on. In simple cases, there may be only one directory, which contains all of the source code, object code and executable files. For larger programs there is likely to be a more complex structure with multiple directories beneath the home directory. When plusFORT programs run, they will create new files and sub-directories within the working directory. For example, SPAG, by default, will create a sub-directory called SPAGged which will contain restructured output files, symbol files and coverage analysis data files. It will also create a text file called spag.log containing a transcript of the latest run. GXCHK will create a hypertext report called gxchk.htm, a plain text report called gxchk.out, and a sub-directory called _pfdata containing HTML files.
If you selected Restructuring (optionally with Static Analysis) on the front page, then after the working directory is set, four new tabs will be available - namely Configure SPAG, Run SPAG, Configure GXCHK, and Run GXCHK, and the first of these will be selected.
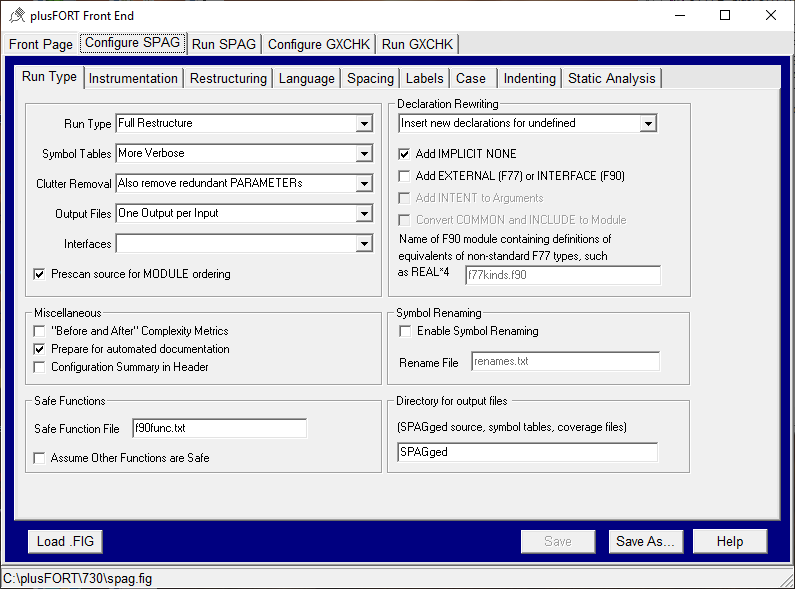
Figure 9 The SPAG Configuration Pages
Within that page is a second, subordinate tabbed dialog, with each tab containing controls which allow you to set the SPAG configuration options described in section 2.6 of this manual. On Windows and Linux, you can view context sensitive help pages from the plusFORT manual by selecting a control and pressing F1. You can also view the SPAG configuration item number for each control by hovering the mouse cursor over it, and watching for hint text.
By default, any changes you make to the configuration options are temporary, and apply only to runs performed within the current PFFE session. However, you can use the Load, Save and Save As... buttons to modify and save configuration files for later use.
Depending on the type of run you are doing, there may also be Configure GXCHK and Configure CVRANAL tabs available in the outer tabbed dialog to allow you to edit the configuration options of those programs.
Once you have adjusted the configuration options as required, you should click on the Run SPAG tab.

Figure 10 Running SPAG
The next step is to load the source files you want to process using the Multi-Add button, which allows you to add multiple files from a single directory. If your source code is spread across several directories, you can repeat this step as required. There is no need to stay within the confines of the working directory. You can also use Clear to empty the list of files, or Remove to remove selected files.
For complicated cases, it may be worthwhile to use Save Project to save the list of files as a project. Then Load Project can be used to reload the list.
Once the list of files is ready, click GO! to start SPAG. Messages detailing the progress of the run are written to the SPAG Output Log (the same details you would see if running SPAG from a command prompt). You can pause and resume the run, clear the output log, or terminate the run immediately using the buttons below the output log.
Regardless of the location of the input files, the output log file (spag.log) is written in the working directory, and other outputs (resdtructured source code, symbol files etc.) to a subdirectory of the working directory created (if necessary) by SPAG. The name of the subdirectory is SPAGged by default, but may be specified in the SPAG configuration (see lower left of Figure 9)

Figure 11 After SPAG had Completed
If the SPAG run completes normally, and static analysis has been requested, a dialog apeears to ask whether you would like to run GXCHK
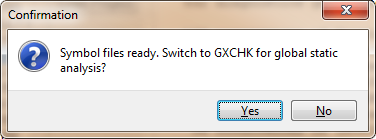
If you opt to continue, PFFE automatically switches to the Run GXCHK tab. The file list is automatically populated with the symbol files created by SPAG in the run we have just completeed. If required you can switch to the Configure GXCHK tab to make adjustments, but in most cases, you can just click GO! to run GXCHK. As an alternative, you can load the symbol files of a previous SPAG run using Multi-Add.
When GXCHK completes, it enables the Browse button, which loads the HTML output report produced by GXCHK (see chapter 3) into your default browser.
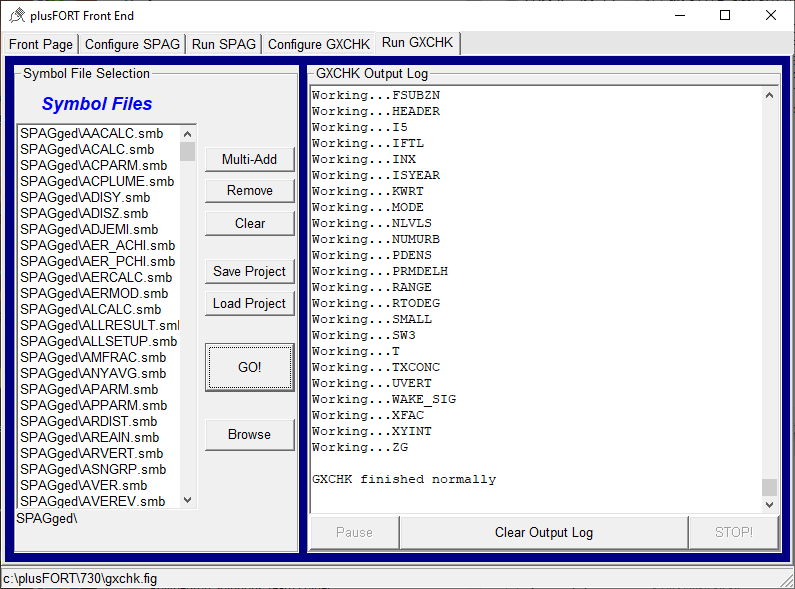
Figure 13 Ready to Browse HTML Report
If you selected Run Coverage Analysis Post-Processor on the front page, then after the working directory is set, two new tabs will be available - namely Configure CVRANAL, and Run CVRANAL, and the second of these will be selected.
At this stage you can, if required, switch to Configure CVRANAL to adjust configuration options. When that is done, use the Multi-Add button to add the .CVR files generated by SPAG and updated by the instrumented version of your target program. Then, just click GO! to run CVRANAL.
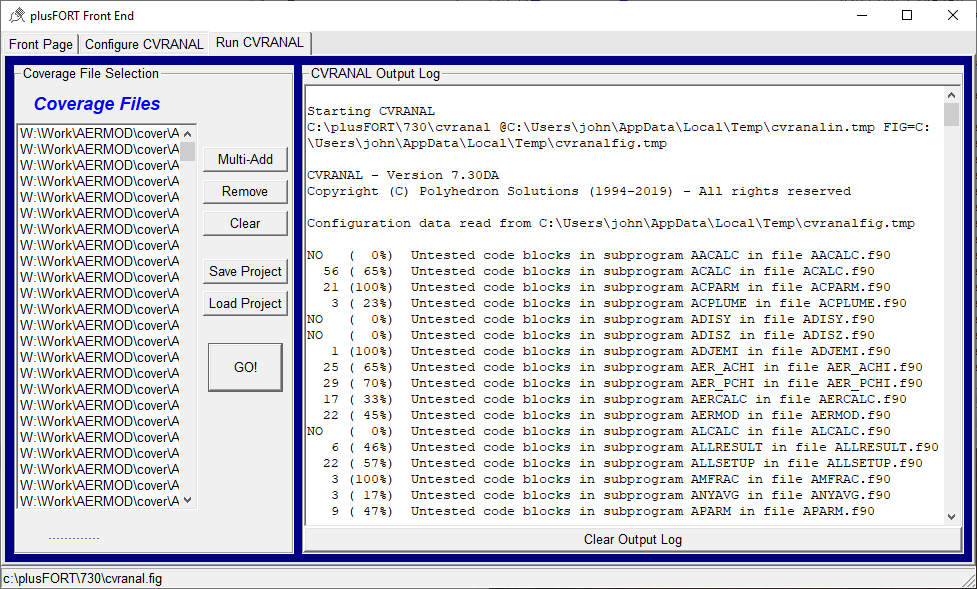
Figure 14 Running CVRANAL
The procedure for running HyperKWIC within PFFE is very similar, but after the setting the working directory, only one new tab is displayed - namely Run HyperKWIC. Use Multi-Add to select the source code you want to analyse. and click GO! to run HyperKWIC.
When HyperKWIC completes, it enables the Browse button, which loads the HTML output report produced by HyperKWIC into your default browser.
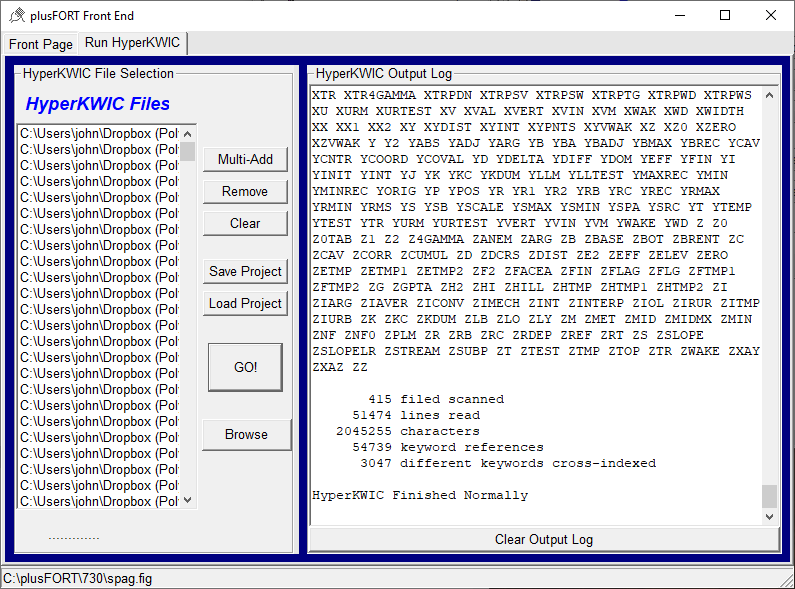
Figure 15 Running HyperKWIC
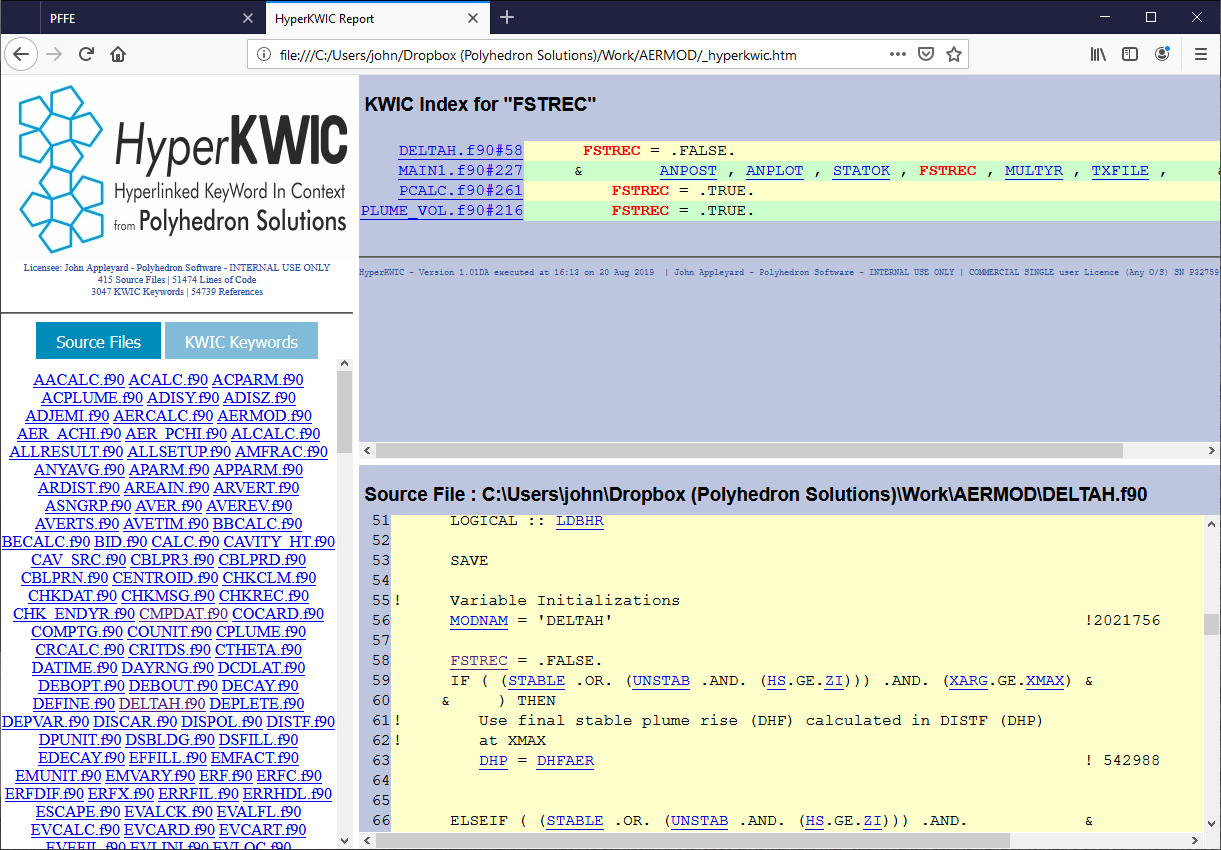
Figure 16 A HyperKWIC Report